photography tips

Preparing for your Senior Portrait Session!

Senior Portrait Sessions are one of my favorite kinds of Photoshoots! Here’s why…

When I look back at the person I was in High School and into College, I see how every decision, interest, hobby, job, internship, etc molded me into the person I am today. It was through this life journey that I discovered art, friendships and a passion for travel. Having an education and the opportunity to explore what I wanted to do with the rest of my life was something I will never take for granted. It was some of the best years of my life!

senior-portrait-photographer

Sunset Senior Session at Laurelwood Arboretum

Senior portraits are all about documenting this monumental time. They are so much more than just a headshot in a graduation cap. It should be a reflection of the person that earned that graduation cap.

While of course I encourage all of my Seniors to have a few “Formal” images in their cap and gown (mostly for mom and dad) I also want to see the real YOU! This will probably be one of the most fun and personal photoshoots you will experience in your lifetime. Here are some tips on how to get beautiful and authentic images.

incorporate your hobbies and interests

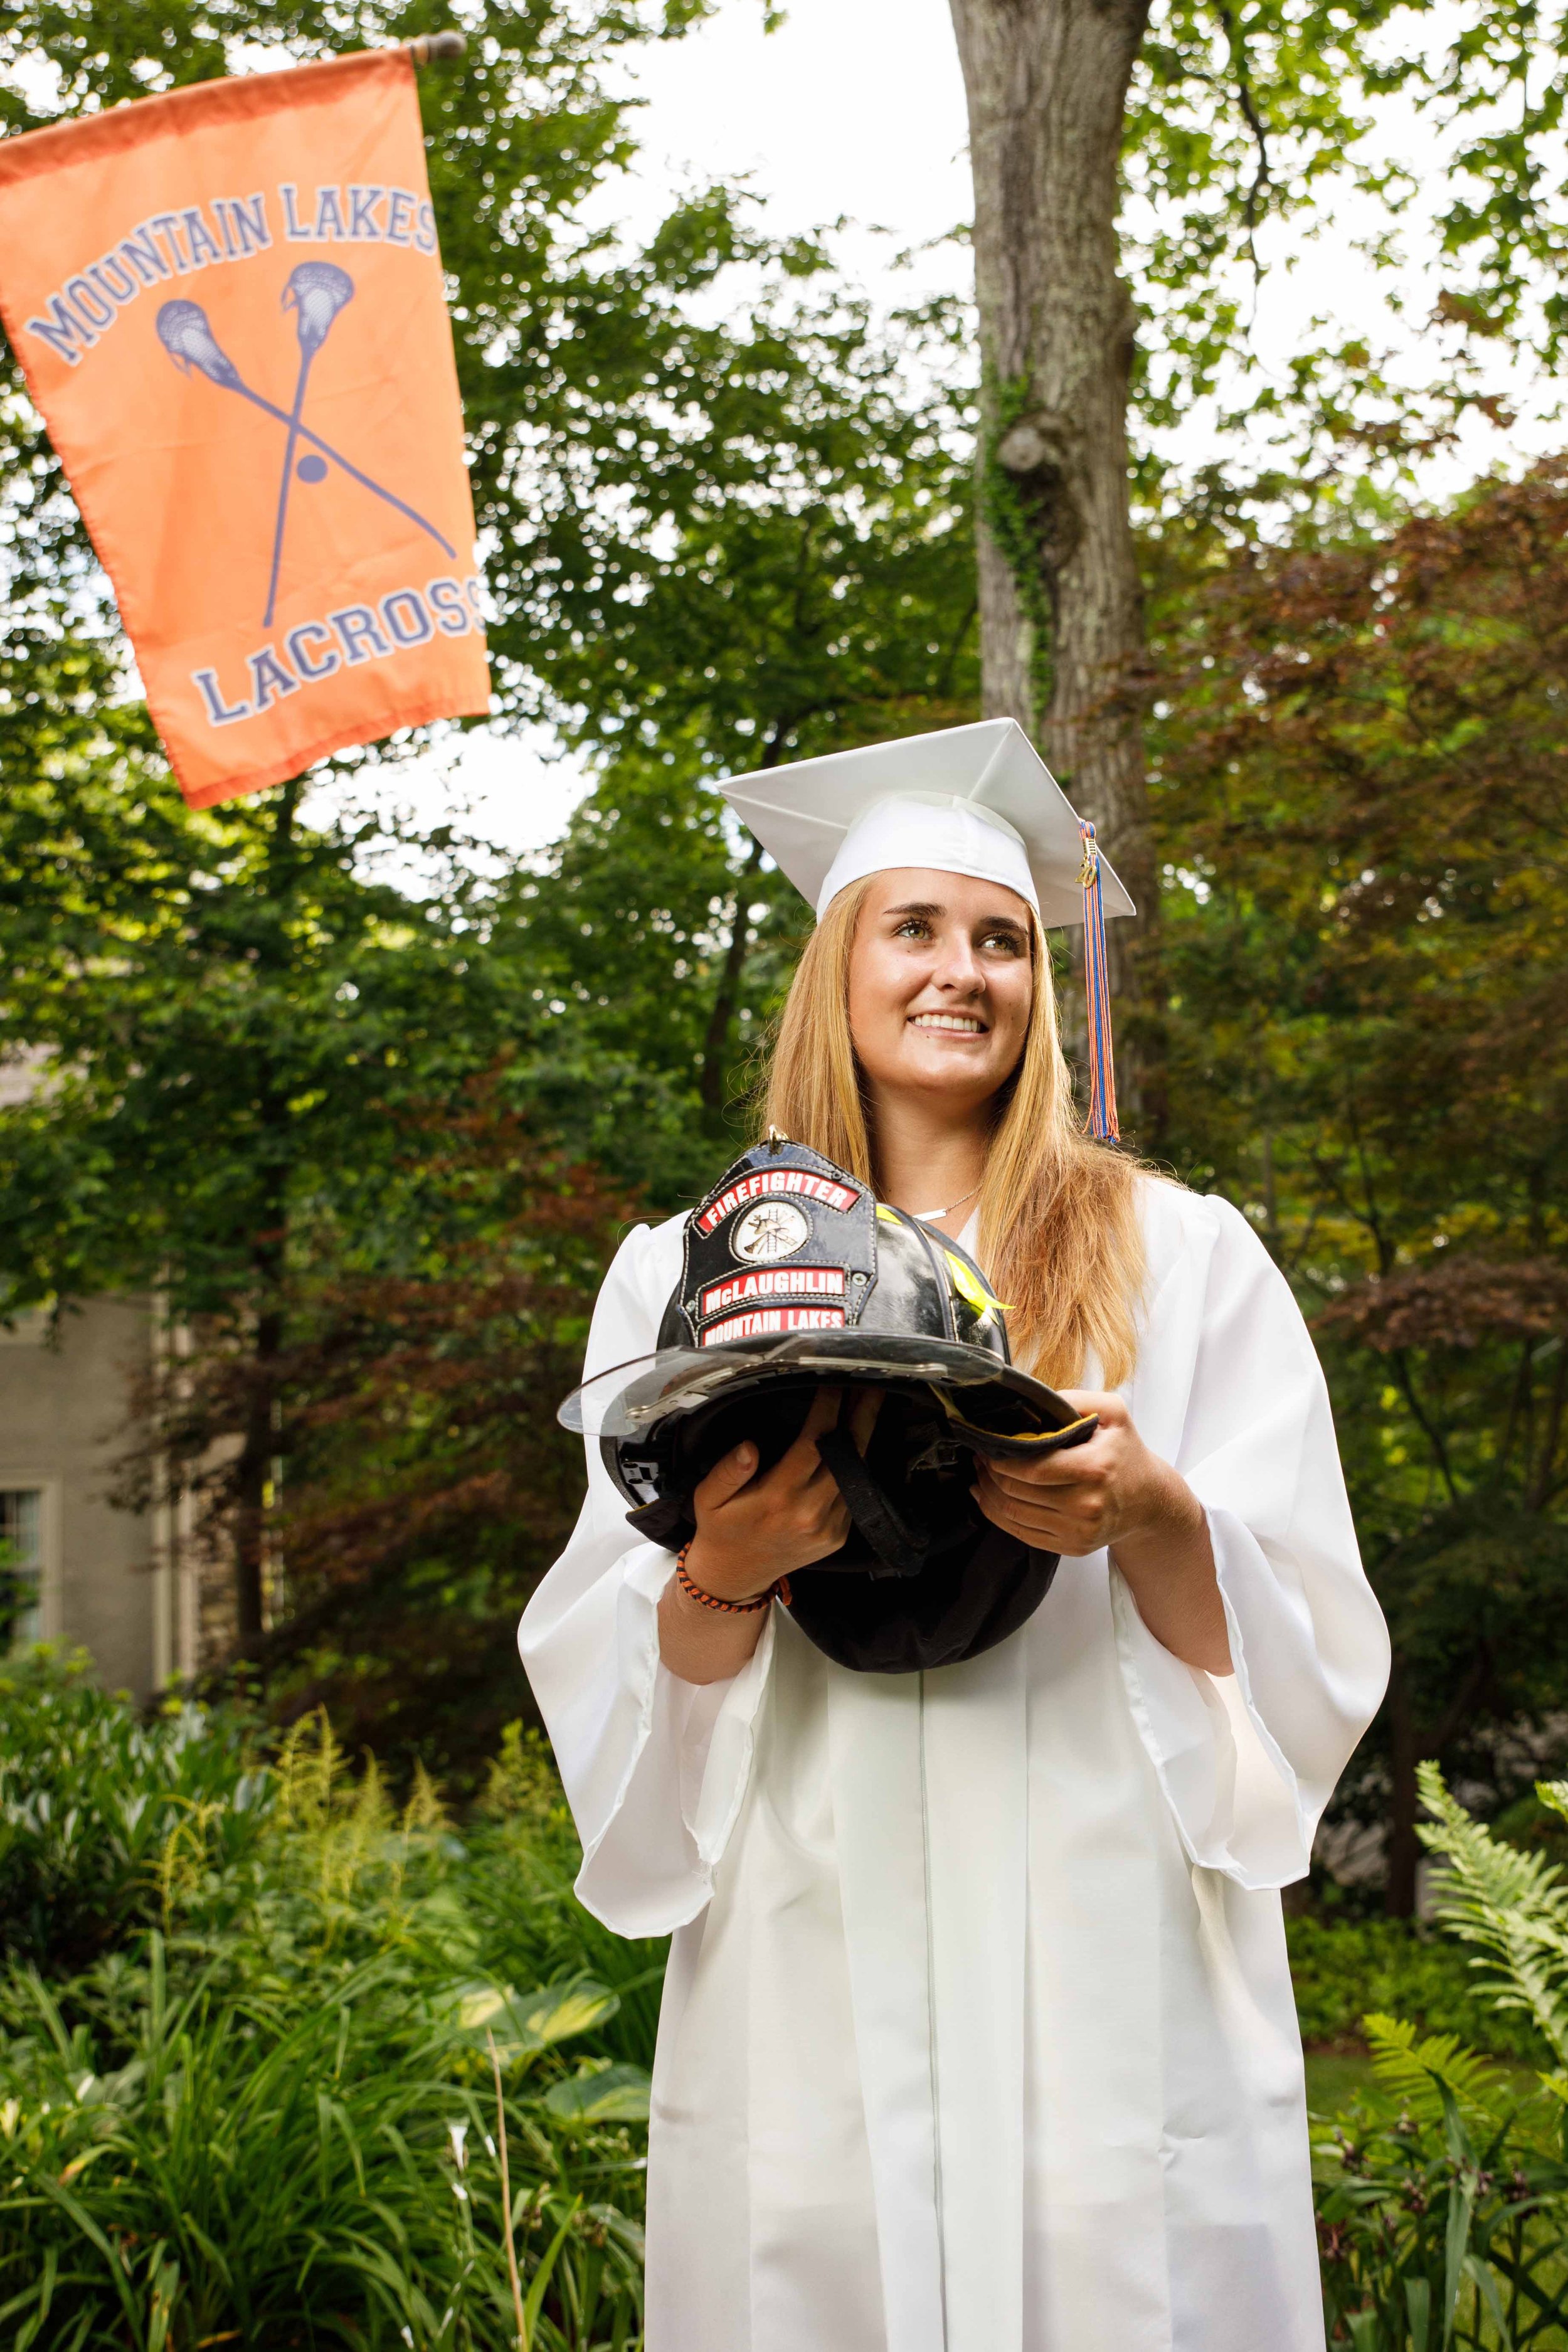
In my opinion, this is the best part about Senior Portrait Sessions. I have had the pleasure of photographing Volunteer Firefighters, Surfers, Soccer Players, Cheerleaders, Gamers and more! I have never experience two senior sessions that are the same. Each has been unique and story telling in its’ own way! Whatever it is that interests you, let me know and we will find a way to incorporate it into your session.

Choose a Location that is a Reflection of You

lbi-senior-portrait-session

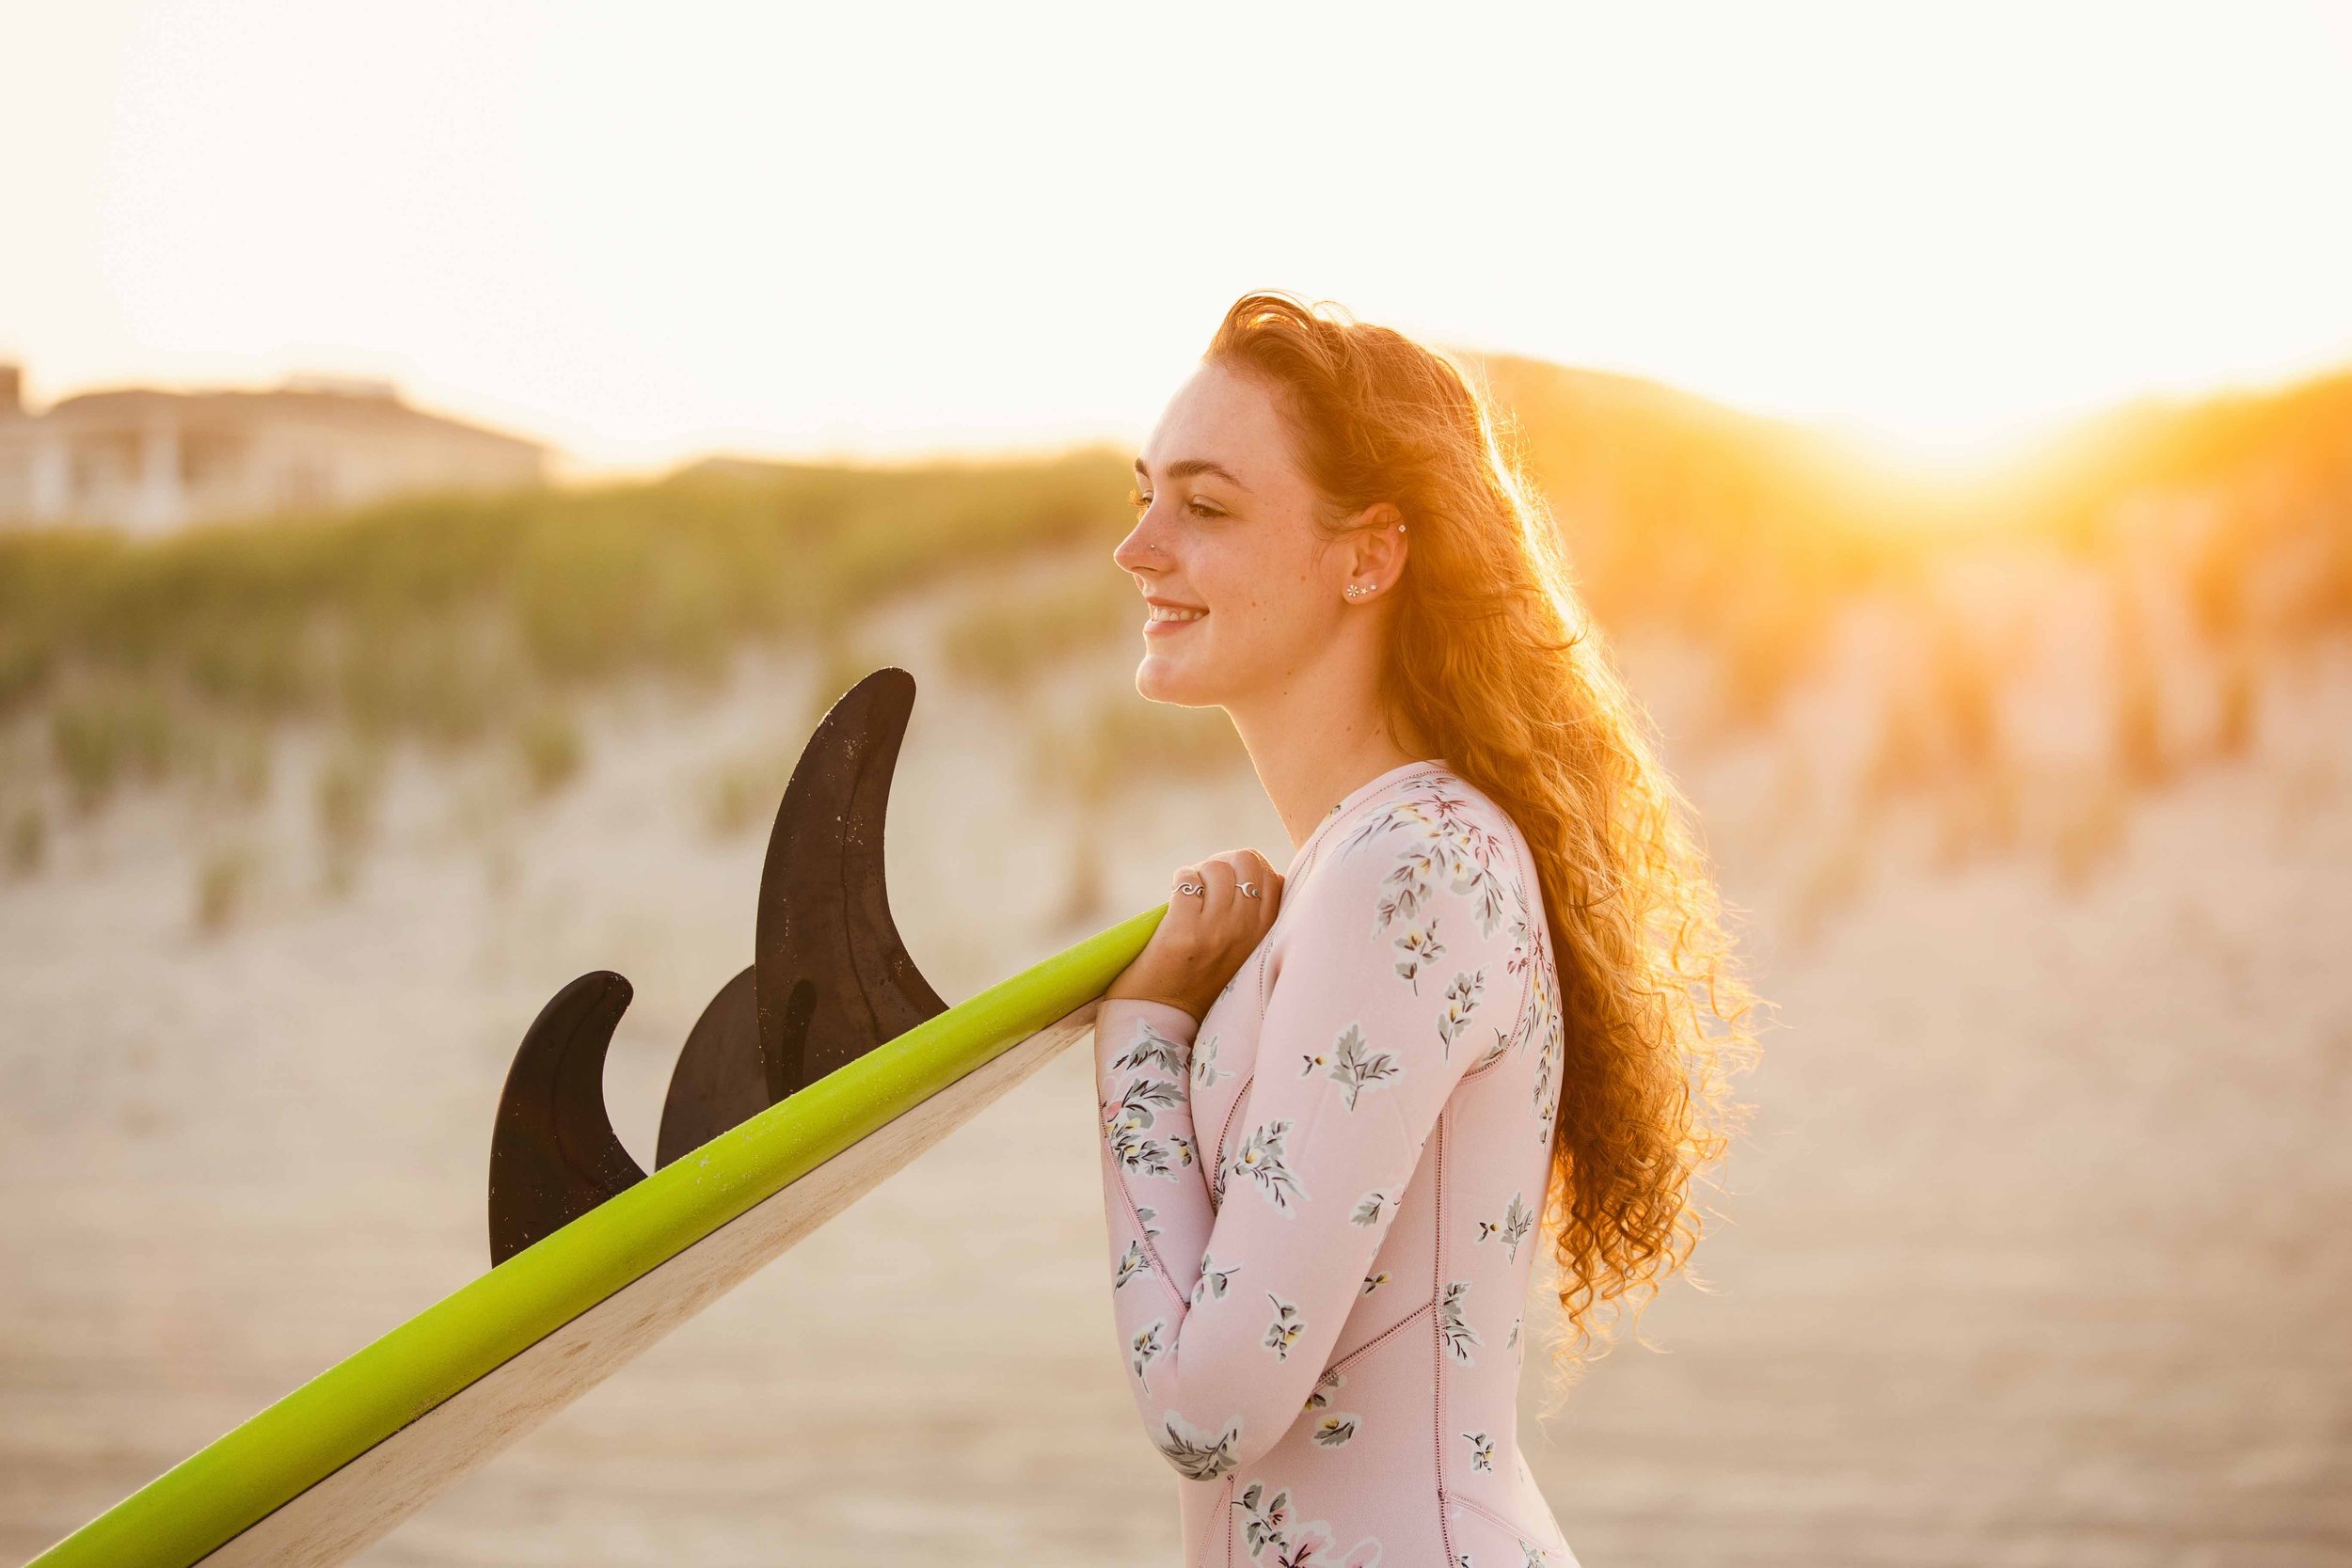
Caroline loves surfing and it is an important part of her identity. We loved photographing this beach session in LBI, New Jersey!

Going along with your hobbies and interests, finding the right location is a crucial part of Senior sessions. Do you love the city? Doing your shoot at Liberty State Park with the NYC Skyline or in Dumbo with the Brooklyn Bridge could be an option! More of a nature person? I have plenty of parks and trails to recommend! If your not sure where to have your session, we will collaborate together to find somewhere that is the perfect fit!

bring multiple outfits

montclair-state-university-graduate

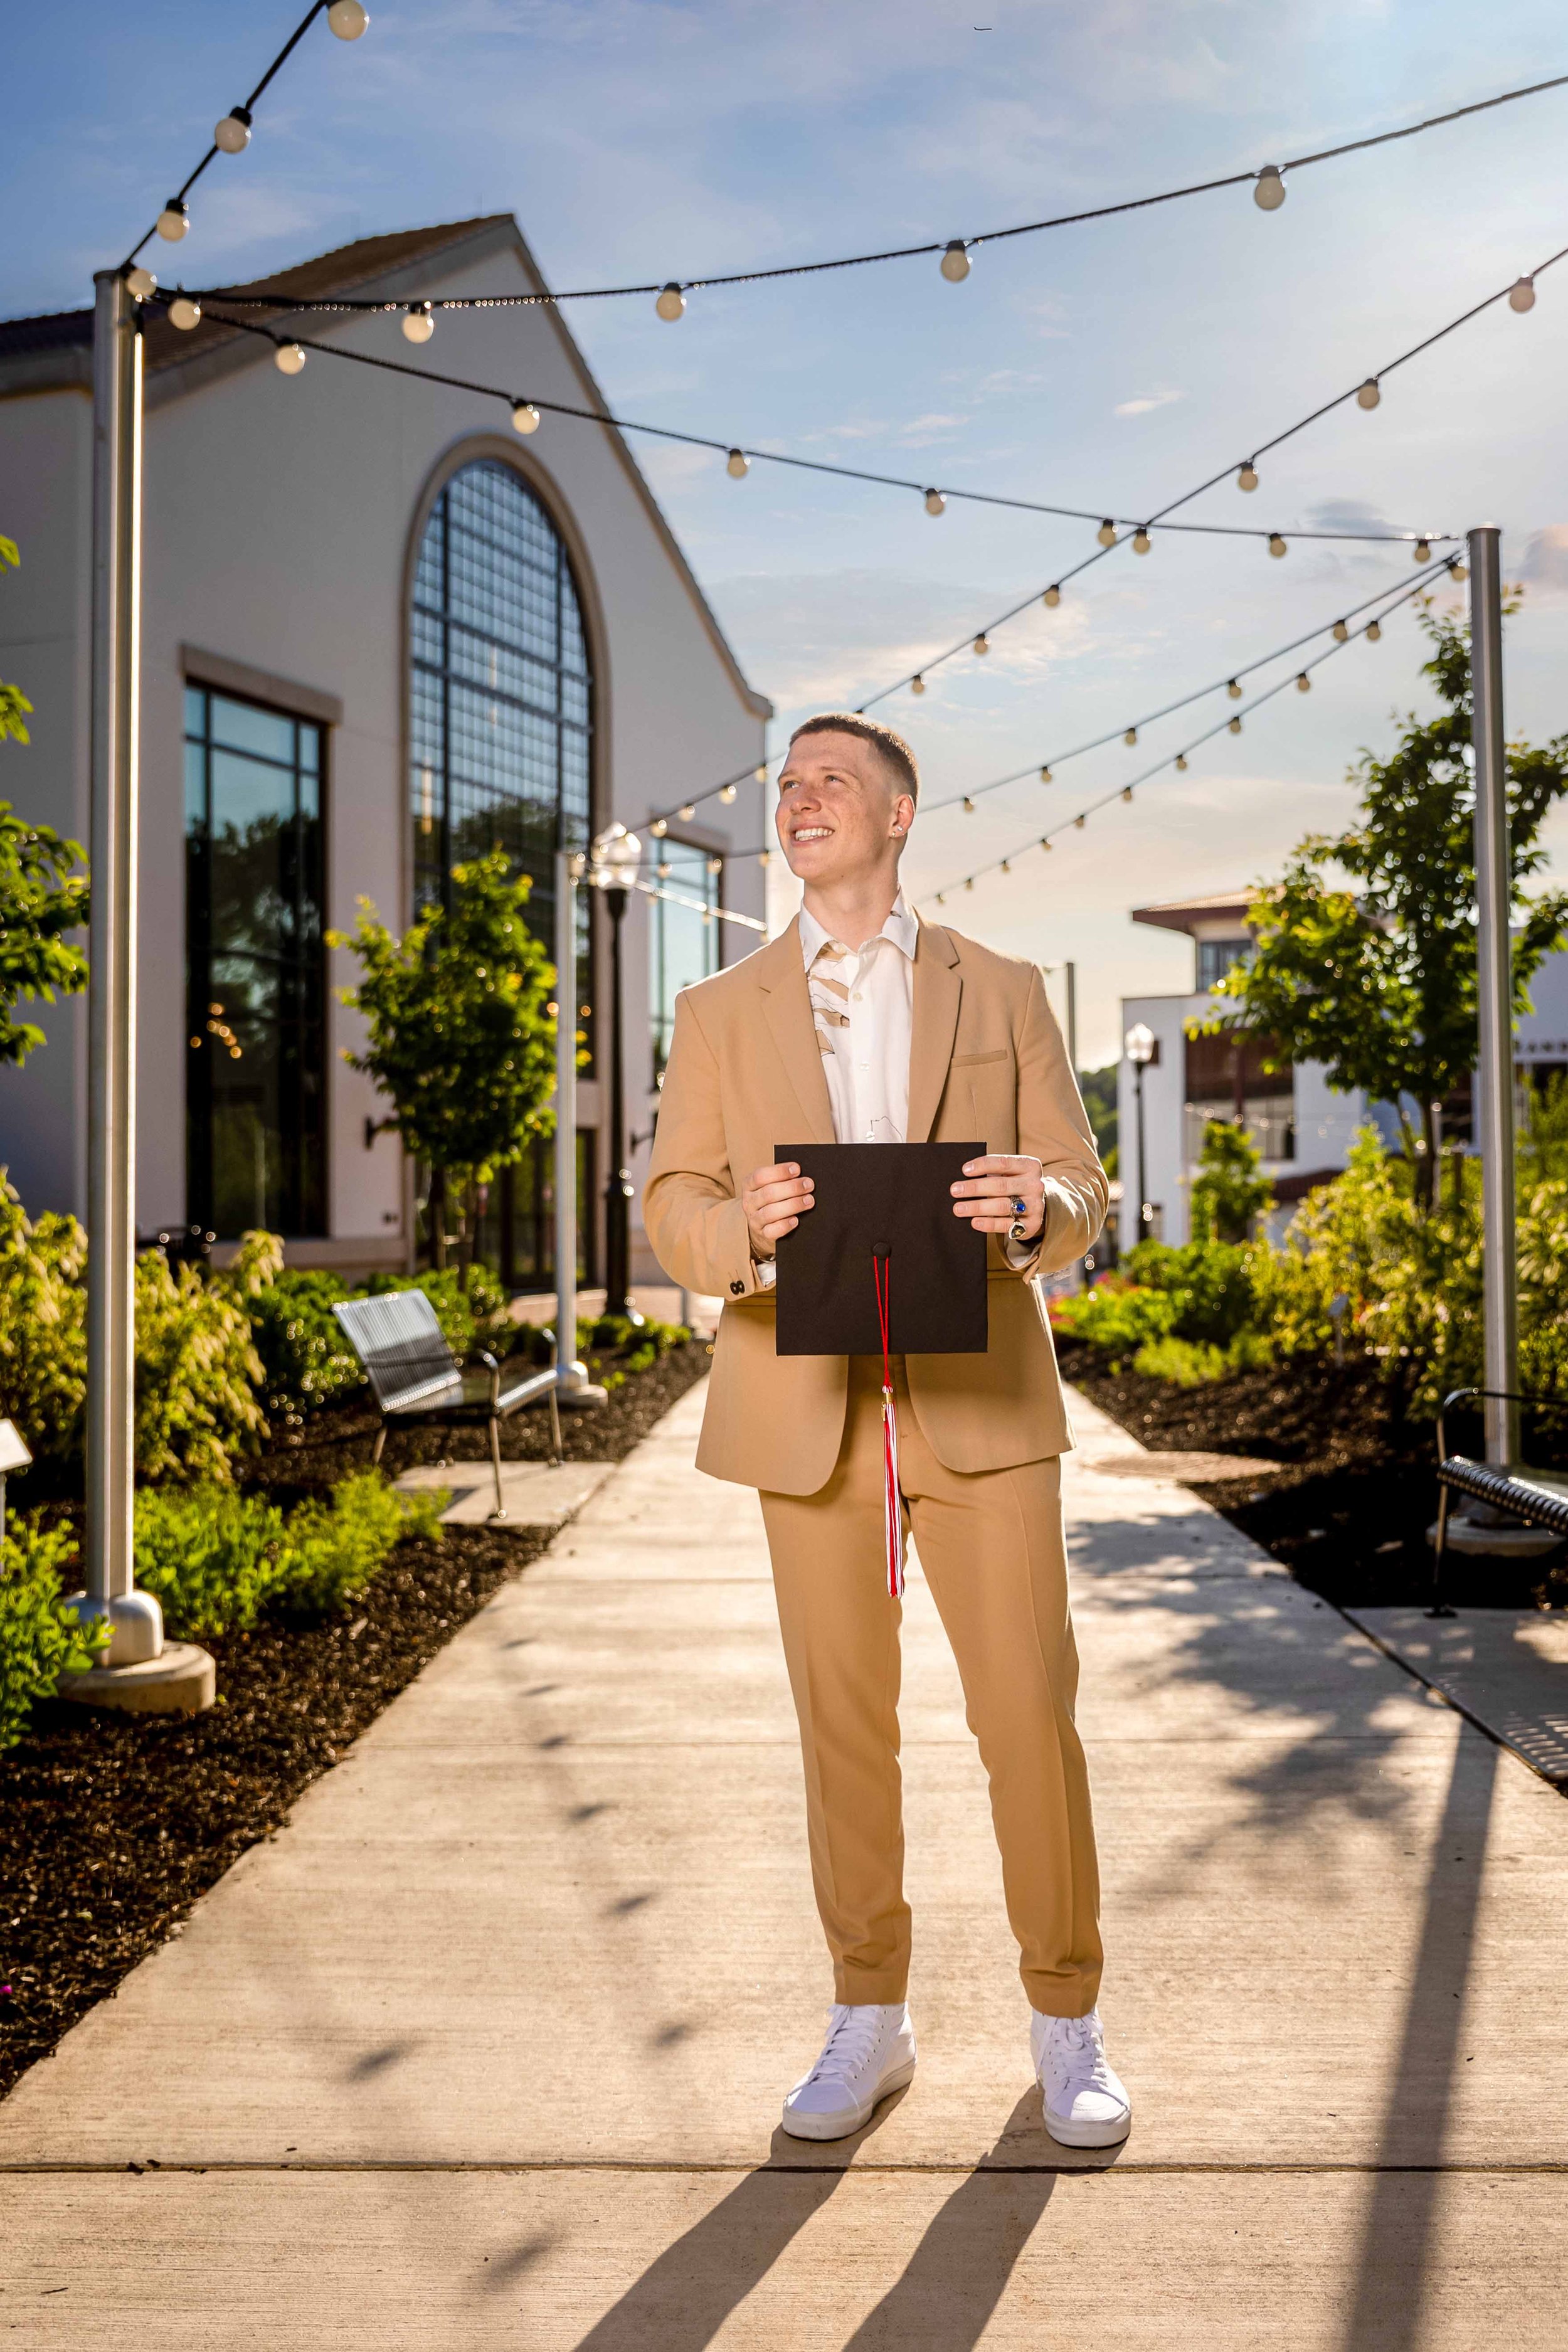
Jake wore a neutral, summery suit that worked perfectly for this grad session at Montclair State University!

I usually recommend having 2-3 outfits on hand for your session including your Cap and Gown if that is something you are interested in having photographed. For ladies, I find a white dress has been the most popular look for more of the formal images. For guys, I recommend a neutral suit or jeans with a nice button down.

north-jersey-senior-portrait-photographer

Alia wore a jean jacket she made herself!

For a casual look, this can be anything you want! One of my past seniors enjoyed making her own clothes, so we of course had to photograph her in something she made herself! Another idea could be to include your sports teams jersey. A popular look is including a tee-shirt or sweatshirt with a college logo on it. Not sure what to wear? Just ask and I am happy to help!

Adriana rocked a Drew University tee shirt for part of her Senior session!

Just be you 😊

This is the best piece of advice I can give. Senior portraits are meant to be an intimate reflection of the person you are today, and who you aspire to be in the future. Have fun, and be yourself!


How many hours of coverage do I need for my event?

This one is great for clients and photographers!

Many of you don’t know this, but I photograph about 50+ Weddings a year! 😱 I work for an awesome company called Milton Gil Photographers, which I’m sure if you are based in New Jersey you have probably heard of them. Seeing that I do so many Weddings, your probably wondering why I don’t advertise them. To be honest, it’s not my passion and it is much more manageable for me to prioritize my portrait work while still having a side hustle (because who doesn’t love a good side hustle?!). That being said, I am happy to photograph small events, anything up to 8 hours maximum. These include Baptisms, Mitzvahs, Baby or Bridal Showers, Engagement Parties, you name it.

Since I do so many events throughout the year, I’ve really nailed down exactly how much time is required for everything to be photographed. My hopes is that whoever is reading this post really gets something out of it whether you are trying to figure out how many hours of coverage is right for your Wedding/Event, or if your a photographer breaking into the field.

building a timeline is how you manage your clients expectations.

Where to start…

When having a consultation with a client you should be prepared with a list of questions. What time does your event start? Would you like photos getting ready? Who absolutely needs to be photographed? What time are guests arriving?

I send all my clients a questionnaire using an awesome booking software called Session. I’ve heard you can do the same with programs such as Honeybook. These questionnaires are essential in planning your clients day because if you don’t schedule enough time to capture everything they requested, that’s on you, not them.

That being said, it’s important I mention the next point…

Photographers don’t take “one or two” pictures of things.

This one is really important. I hear a lot “I only need one or two pictures of…”

But I’ve never had someone complain that I gave them “Too many pictures.”

The same way you wouldn’t want your hairstylist to rush through your haircut, we don’t want to be rushed to take a photo. We risk someone blinking, having their mouth open, the picture being out of focus or maybe the exposure wasn’t ideal because we were trying so hard just to get the shot in a matter of seconds.

It’s also nice to have a few different versions of the same type of image in case you want to make an album or product after the fact and we have different options to work with that will best fit the layout. If we take “one or two pictures” of everything we might miss something like an awesome candid moment or an opportunity to create a different look using lighting.

There will always be one family member that is running late for group photos.

How to plan for this…

If your scheduling group photos for 3:00 pm, tell everyone 2:45 or maybe 2:30 for that person you know is always late. There will ALWAYS be that one person that is stuck in traffic or forgot something at the hotel room or can’t find the spot where we are taking photos or maybe forgot about the pictures all together and is now hitting up all the stations at cocktail hour 🙈 I’ve seen it all! It’s better to have everyone ready a little bit earlier so we can get through the family photos quickly and easily.

If you want to learn more about different types of family photos I take with larger groups, check out my recent blog post.

Tell your hairstylist or makeup artist you need to be ready 15 minutes prior to the time the photographer actually arrives.

Let me start by saying I LOVE all my friends and family members that are hairstylists and makeup artists because I know a lot of them and they are probably rolling their eyes at me right now 😅

Not all the time, but a lot of the times our schedule runs behind because hair and makeup needs more time. Let me say this is usually not their fault! Same way that we can’t rush a photo, they can’t rush putting makeup on your face. If my start time is 12:00, I usually ask my client to let the makeup artist know I will be arriving at 11:45 and they need to be finishing up by then. This gives everyone a little extra time to work, and more time means less stress for everyone!

Companies I highly recommend: D’Amelio Cosmetics, The Lounge Hair Studio, Beauty on Demand, The Real Beauty and the Blush, Allyson Rubin Cosmetics

baptism-photography

If your having “getting ready” photos done, here are the details we usually photograph to have them ready for when we arrive.

I always start with photographing details such as flowers, invitations, shoes, etc. Having all the details set aside for when we arrive so we aren’t interrupting you while having your hair and makeup done is super helpful! Here’s examples of details that are usually photographed:

  • Invitations

  • Flowers

  • Balloons

  • Rings/Jewelry

  • Cufflinks

  • Hair pieces

  • Clutch

  • Dress/Tux

  • Baptism, Communion or Mitzvah attire

  • Shoes

  • Any customized details such as signs, shirts, flasks, etc.

  • Family heirlooms

Basically anything that is important to you on your special day!

The timeline is not written in blood.

Expect the unexpected and be prepared for the timeline to change. I’m saying this for both clients and photographers because it is super rare that things go according to plan, and that’s ok! Your still going to have an incredible day and we are going to capture awesome images of you. I always try to create the timeline so I have enough wiggle room for things to change and be able to adapt to what’s happening in the moment. After all, being prepared to capture spontaneous moments and documenting the day is our job!

What you’ve all been waiting for…Here’s a sample of how I build my timeline!

First, I find out what time the ceremony/event is going to start. Let’s say I have a client for a Baptism and the ceremony starts at 12:00 pm…

baptism-photography

If they want “Getting Ready” photos, I start 2-2.5 hours prior to the ceremony.

Here’s the breakdown…

-5-10 minutes to set-up

-30 minutes to photograph details

-30 minutes to photograph “getting dressed” and individual portraits

-1 hour to photograph family portraits (see blog post to see all the different combinations covered in a typical session)

-Break down and travel time

Without “Getting Ready” photos but family portraits prior to the ceremony, I usually start 1.5 hours ahead of time.

This also depends if the family portraits are at the same location as the ceremony, and how large the family is. Again, I always count on someone being late, so I like to allow for enough time.

No getting ready or portraits prior to the ceremony, I usually arrive 30 minutes before start time.

This allows me to have an adequate amount of time to set up my gear, check out the space, evaluate lighting, and meet my client prior to the start of the event.

If you do not do family portraits prior to the ceremony start time, it’s really important to stay organized.

If the Baptism is at 12:00, the reception following will most likely start at 2 or 2:30. A ceremony such as a Baptism typically takes around 30 minutes unless it is a Greek baptism for example which tend to take longer. The hardest part about having the portraits done after the ceremony is organizing everyone together because everyone starts to mingle, talk, or head out to the reception. In my experience the priest/pastor/rabbi has always made an announcement at the end of the ceremony to let guests know that there will be photos proceeding the event.

Also, you have to be sure that the Church does not have any events immediately proceeding. I usually encourage my clients to take as many family photos as possible prior to the ceremony for this reason.

baby-shower-photography

Cocktail hour

Again, if all the portraits are not completed prior to the ceremony or at the church I will reserve a portion of cocktail hour for photos. Keep in mind, everyone wants to enjoy cocktail hour so it is important that if your using this time for any family photos you discuss this with the client prior to the event so they can let their family members know.

If you already did family photos, take a few pictures of the cocktail hour layout! ESPECIALLY if there are any ice sculptures, signature cocktails or custom decor.

Finally, if there is a separate room for the reception with decorations, be sure to reserve enough time to go in an photograph the tables, details, and an outside shot of the building.

Reception

Candid time! If your event has any special entrances or surprises be sure to let the photographers know ahead of time. This is where we capture speeches, people hitting the dance floor, cake cutting and lots of reactions from the guests! If you require any additional group shots this can be organized with the DJ to help bring guests together.

wedding-night-photography

Night shot

This is more common with wedding photography but if you are working an event that goes past sunset be sure to take your clients out to create a memorable night photo!

I hope this guide helps anyone reading it plan their event or feel more confident when booking clients. If you are looking to schedule an event with me or have questions click here!

For Photographers-Why You Should Offer Prints & Products

This isn’t about up-selling, it’s about maintaining the quality of your work

I see a lot of blog posts teaching photographers how to sell prints and how they will make a huge profit offering this service to their clients. While profit might seem like enough of an incentive to get started, I actually want to talk about the importance of why you should be managing how your work gets printed.

I offer a wide variety of products for my clients such as prints, wall art, photo albums, custom USB’s, etc. I also never provide my clients with digital files that can print larger than 8”x10” unless they purchase the larger files (which I price according the size of the print they intend to make). The purpose of all this isn’t so much so I can up-sell; in fact it costs much more to produce products than to simply provide clients with a USB containing all the high-res images. Also, it takes a lot more time because you have to color grade the photos for printing, design a photo album or custom product in photoshop. So why do I bother selling fine art prints?

Because I hate seeing my photographs printed at Wal-Mart 🙈

Or Costco, or Shutterfly or ESPECIALLY Walgreens 😭

You all know exactly what I’m talking about. The horrible color grading, super glossy paper, incorrect cropping…it’s any photographers nightmare.

I made the mistake of giving away high-res files when I first started out.

What made me change my mind is that every time I visited a clients home I would see my once beautiful photograph, printed on a canvas from Wal-Mart and what I witnessed was a direct misrepresentation of my work.

This isn’t a pride thing. I could have easily walked away saying “Who cares, I got paid, they can print them however they want.” If I did that though, I could be potentially losing out on future clients. Why?

Because Not only will I see a bad print, but their friends and family members who come over the house will also see it.

It’s one thing to have your photos look great on Instagram, and another to have them look great printed. If people see that an image looks really good online but “doesn’t print nicely” because it was not printed properly there’s a chance they might not hire you because they don’t believe in the quality of the work. So you can see, having good prints isn’t about up-selling one client, it is about making more clients.

Your work should be impactful, and contrary to popular belief I don’t always think that impact will be made on a cell phone screen. Maybe I’m old school, but anytime I visit a gallery or museum and confronted with a physical work of art, I’m moved in ways that I cannot describe. Think of your clients home as a gallery space, and curate a timeless collection for them they can enjoy everyday.

Not all print shops are created equal.

After ordering a few samples of prints and products from different labs, I found which work best for me. These are my go-to labs for creating products for my clients:

Millers Professional Imaging:

What I love: I use Millers lab for all of my albums and books. There are so many different options for covers such as leather, acrylic, image wraps, and my favorite, personalized foil! They have a really quick turn around time, 2-3 days, and are very cost efficient making it an easy up-sell. I also order smaller products for client gifts such as accordion books through them. A lot of photographers use Millers so there are plenty of templates for albums and products on Etsy making product design super easy!

What I don’t love: Personally, I’m not a fan of their wall prints. Myself and other photographers I know who have ordered from them have seen little dents in the printing, or incorrect color grading. I’m also not crazy about their holiday cards which I argue are the MOST important product you can print because it is like sending out a personal business flyer to thousands of people! Read on to see who I use for card printing.

White House Custom Colour:

What I love: If you are looking for luxury prints, look no further. I’ve ordered custom cards, metal prints, mounted prints and more from WHCC and have yet to be disappointed. Their care and attention to detail is incredible and the customer service is 5 Star. They also provide you with a lot of resources to help you sell your products such as unbranded online catalogues. The holiday cards are especially my favorite and I splurge on quality paper when creating them for my clients. The soft matte paper literally feels like velvet! Every year I get new clients around the holidays reaching out because of the “incredible holiday card their friend sent out last year” so you know it’s not being overlooked! If all that is STILL not enough to convince you, they also give you lollipops when sending over your print 😁

What I don’t love: The albums and books. I’m patiently waiting for them to come out with more options for cover designs so until then I will continue using Millers. Also, if you are not making much of a profit off of your prints and products (which maybe re-evaluating your pricing structure is the simple answer for this) please note that WHCC is pricier than other labs so make sure you are charging enough.

Tyndell Photographic:

What I love: For the quality and price, you can’t beat Tyndell Photographic. I use this company for all my crystal rose-gold USB’s and presentation folders. I love that I was easily able to upload my logo and I only pay one time for them to create a mold for my business. Keep in mind that you are paying for each size they create, so for example I paid for the mold for USBs as well as a 2”x3” mold for folders. You can also order bags, boxes, USB cases and more. The pricing scale is based on how many of each product you purchase so I usually evaluate how many sessions I have booked per quarter and order based on that. Be sure to check out their starter packs for premium pricing options.

What I don’t love: The shipping time 😕. It usually takes about two weeks to get the products in so if you know you have a bunch of sessions coming up during busy season and are running low on your presentation products I would order ASAP to get them on time. No client wants to wait weeks on end to receive their products.

While I haven’t used the following companies, these are some recommendations from fellow photographer friends:

Artist Uprising

NP Photo

Design Aglow

White Wall

I hope this post inspires you all and gives you the tools you need to get started selling prints! In the coming weeks I’ll be developing an online course going into how I sell prints! Subscribe to my blog to stay updated ☺️